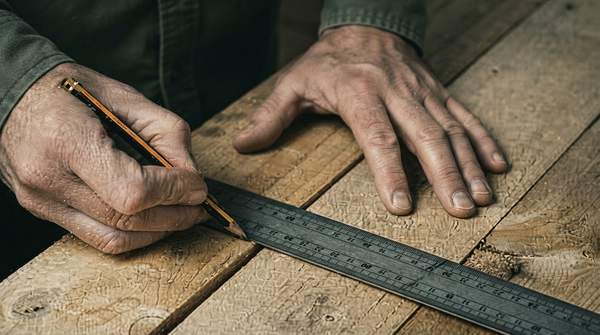
Accurate woodworking is less about owning every tool and more about picking the right one for the task at hand. A tape measure, a combination square, calipers, a marking gauge, and an angle finder each solve a different problem, and reaching for the wrong one is a common source of misfit joints and wasted stock. This guide explains the hierarchy of precision among these essentials and maps common woodworking tasks to the best tool for each, so you can choose deliberately instead of by habit.
Understanding the Hierarchy of Precision
Not every measurement demands the same accuracy, and the first skill is recognizing how precise a given task actually needs to be. At the general end of the hierarchy sits the tape measure. As the Woodworkers Institute notes, it is versatile and can be carried anywhere, which makes it the natural choice for rough lengths and board dimensions—places where a fraction of a millimeter is irrelevant. That portability comes with a trade-off: its markings and hook are designed for convenience, not for the fine distinctions that joinery requires.
Next comes the combination square, which the same source describes as offering precision in setting up joints and ensuring accurate cuts. It handles 90° and 45° angles, short-distance measuring, and depth checks, making it the workhorse for layout that must be right but not microscopic. Gregory Mills, writing for Pro Tool Reviews, calls it "one of the most useful woodworking measuring tools ever made" and notes it functions as a tri-square for both 90 and 45 degrees. That versatility is exactly why it deserves a permanent spot on the bench.
At the top of the hierarchy sit calipers and the marking gauge. Calipers, according to the Woodworkers Institute, provide accurate measurements down to fractions of a millimeter or inch—"far more exact than a tape measure"—when extreme precision is needed. The marking gauge serves the marking side of that same precision: it scribes consistent lines parallel to an edge, guiding saws or chisels for cutting or joining. The operating principle across all five tools is simple: use the coarsest tool that satisfies the task, and step up only when the job demands finer resolution.
Essential Measuring and Marking Tools for Woodworkers
Here is what each of the five core tools does best, and what to look for when you reach for it. A tape measure handles general lengths anywhere in the shop or on site; the Woodworkers Institute recommends choosing one with clear, durable markings and a strong locking mechanism, since a tape that slips mid-measure defeats its own purpose.
The combination square checks squareness, measures depth, and marks straight lines on wood. Because its head registers against a reference edge, it transfers that edge into a perpendicular or 45-degree line with repeatable consistency—something a tape measure cannot do. For layout work, that edge-registration is its defining advantage.
Calipers measure thickness, diameter, or the depth of small parts and fine details. Digital versions are the easiest to read, eliminating the interpretation that analog scales demand. The marking gauge lays out joinery by scribing lines at exact distances from the wood's edge, which the Woodworkers Institute describes as essential for accurately positioning joints. Finally, a digital angle finder or protractor allows accurate measurement and transfer of angles, especially on complex projects with non-right angles that no square can capture.
Two caveats frame all of this. First, this hierarchy is qualitative: woodworking publications describe these tools' relative precision in general terms rather than numerical tolerances, so treat the rankings as practical guidance rather than laboratory specifications. Second, this guide covers common hand tools for woodworking and shop use; it does not extend to brand recommendations, product reviews, or large-scale carpentry tooling.
Decision Framework: Choosing the Right Tool for Your Task
The table below maps common woodworking tasks to the most appropriate tool, based on each tool's documented function and precision characteristics. Read it as a decision aid: find your task in the left column, then check whether an alternative makes sense given the precision your project actually requires.
| Woodworking Task | Primary Tool Choice | Why It's Best | When to Use an Alternative |
|---|---|---|---|
| Checking for square (90°) and marking perpendicular lines | Combination square | Its square head is specifically designed to verify 90° and 45° angles and mark straight lines, with precision suited to joint setup. | Use a tape measure for rough length checks where angle accuracy doesn't matter. |
| Measuring and setting specific, non-standard angles | Digital angle finder or protractor | It measures and transfers angles accurately, including non-right angles on complex projects. | Use a combination square when the angle is a standard 90° or 45°. |
| Scribing a precise line parallel to an edge | Marking gauge | It produces precise, consistent lines parallel to the edge, guiding saws or chisels for cutting or joining. | Use a combination square with a pencil for one-off lines where joinery precision isn't critical. |
| Measuring thickness, diameter, or depth of small parts | Calipers | They measure down to fractions of a millimeter or inch—far more exact than a tape measure—for fine details. | Use a tape measure for large dimensions where fine precision is unnecessary. |
| Making straight crosscuts or holding assemblies square | Speed square | Per Pro Tool Reviews, its primary shop use is as a saw guide for straight cuts, and it holds work square during assembly; it also resists going out of square under rough treatment. | Use a combination square when you also need depth measurement or angle checking at 90°/45°. |
The pattern across these rows is the precision hierarchy in action. Tasks that guide a blade—joinery layout, thickness checks, angle transfers—call for the finer tools, because a scribed line or a fraction-of-a-millimeter reading directly determines where the cut lands. Dimensioning and assembly tasks tolerate the coarser tools, where a tape's portability or a speed square's durability matters more than microscopic resolution.
Notice also the alternatives column: it is not a ranking of quality but of fit. A caliper is not "better" than a tape measure for cutting a board to length; it is merely the right tool for a different question. Choosing by task, not by prestige, is what separates efficient work from tool collecting.
Achieving Accuracy: Your Next Steps
To consistently achieve precise results in woodworking, always select your measuring and marking tools based on the specific task's precision requirements, rather than defaulting to general-purpose tools. Before your next project, review your cut list and identify which tasks involve joinery layout, small-part measurement, or angle transfer, then confirm you have the matching tool ready at the bench. The measurable indicator of success is improved accuracy in cuts and joinery, reduced material waste, and increased confidence in project outcomes—benefits you should be able to see in the fit of your very next joint.
Sources
- Top 7 Essential Woodworking Measuring Tools — Woodworkers Institute
- Best Woodworking Measuring Tools and Marking Tools - An Ultimate Guide — Pro Tool Reviews