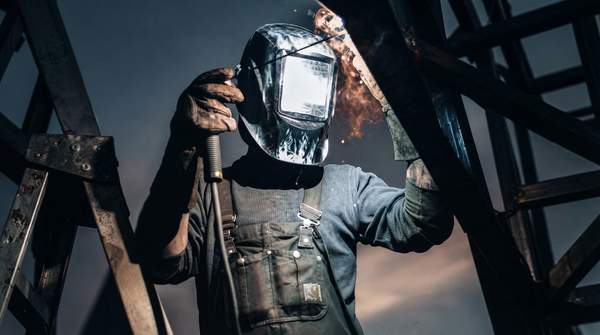
Choosing among the three main helmet types comes down to three questions: how varied your welding processes are, how often and how long you weld, and what you can spend. If most of your welding involves similar material and one process, Miller Electric's guidance points to a fixed-shade auto-darkening helmet. If you move between MIG, TIG, stick, and plasma cutting with different materials, a variable-shade auto-darkening helmet lets you adjust the shade to each job. If you weld occasionally, want the lowest cost, and value a crisp view of the puddle, a passive helmet remains a legitimate choice—safety equipment supplier Phillips Safety considers passive lenses generally more optically clear and much cheaper than auto-darkening lenses.
Understanding Welding Helmet Types
Welding helmets fall into three categories, and the differences between them are mechanical rather than mysterious. A passive helmet uses a fixed tinted lens that maintains a constant shade the entire time you weld—typically shade 10 or higher, which one comparison guide associates with stick welding. Because the lens never lightens, you must flip the helmet up to see your workpiece between welds and down again before you strike an arc. There are no electronics, no sensors, and nothing to adjust.
Auto-darkening helmets replace the static glass with a liquid crystal display in the lens, as Paige Pesko explains in a Welding For Less guide. With the helmet in the down position, you see through a light lens that gives clear visibility of the weld piece and the surrounding area; once the arc is struck, the lens darkens automatically. From there the category splits. Fixed-shade auto-darkening helmets darken to a single preset shade every time. Variable-shade versions let you select the shade yourself, and Miller Electric's helmet-selection guidance puts the typical weld shade range between #8 and #13.
The practical difference between the two families is workflow. An auto-darkening helmet, whether fixed or variable, "makes working in tight spaces much easier," welder Scheerer told Canadian Metalworking, because "a welder has the ability to have the helmet down when getting ready to weld, so they don't need to constantly reposition themselves to remove or flip the helmet. It really makes things much easier and allows for welding to begin without any manoeuvring." A passive helmet demands that manoeuvring on every single weld.
One safety distinction matters before any convenience comparison: auto-darkening helmets provide constant UV/IR protection regardless of the shade state, so your eyes are shielded even in the lens's light condition before the arc fires. With a passive helmet, protection depends entirely on the fixed dark glass being between your eyes and the arc whenever welding occurs—which is exactly why the repeated up-and-down flipping carries a flashing risk if the timing slips.
Welding Helmet Comparison Table
The table below maps each helmet type's documented features against the criteria that actually drive a purchase: how the lens behaves, how convenient it is day to day, who it suits, what it typically costs, and what you give up. Cost is shown in relative market tiers rather than dollar figures, since prices vary by market, retailer, and included features. Note that retailers such as Harris Welding Supplies list lens shade, viewing area, optical clarity, headgear comfort, and welding application as the standard axes for comparing helmets—so these six dimensions track how the market itself evaluates the choice.
| Dimension | Passive Helmet | Fixed-Shade Auto-Darkening | Variable-Shade Auto-Darkening |
|---|---|---|---|
| Lens Technology | Fixed tinted glass at a constant shade, typically shade 10 or higher; no electronics | Liquid crystal lens darkens automatically to one preset shade the moment the arc ignites | Liquid crystal lens darkens automatically to a shade you select, typically within the #8–#13 range |
| Convenience | Requires manually lifting and lowering the helmet to see before and after each weld, which can interrupt workflow and increase the risk of flashing | Hands-free operation with instant adjustment to darkness; helmet stays down, which is beneficial in tight spaces | Same hands-free operation, plus adjustable shade and, on most models, adjustable light sensitivity for different environments |
| Best For (Skill Level) | Beginners and hobbyists with limited budgets and infrequent welding needs; may be less convenient for continuous work | Welders doing repetitive tasks with similar materials and processes; less adaptable for varied work | Professionals and multi-process welders working across different processes, materials, and applications |
| Typical Welding Process | Best for stick welding and general applications where the shade requirement is consistent; not ideal for varied processes | Single-process production work where one shade suits every weld | Multi-process work—MIG, TIG, stick, and plasma cutting—where the right shade changes with the process and material |
| Cost Tier | Lowest tier; replacement lenses are inexpensive and easily swapped | Mid-tier; entry auto-darkening units sit just above the passive range | Highest tier among the three types |
| Key Trade-off | Cheapest and often clearest vision, but constant flipping interrupts work and demands careful timing | Hands-free convenience at a moderate price, but a single shade and, on most models, fixed sensitivity limit flexibility | Maximum versatility and comfort across processes and environments, at the highest cost |
Reading the table by row shows why no single type dominates. Passive wins on cost and, per Phillips Safety, generally on optical clarity. Fixed auto-darkening wins on convenience per dollar when your work is repetitive. Variable auto-darkening wins on adaptability, and its cost premium buys exactly the flexibility the other two cannot offer.
Choosing Your Helmet: A Decision Framework
Start with your primary use case rather than the price tag, because the right scenario determines the right type. The framework below matches three common situations to the helmet each supports.
- Occasional use, hobbyist, or tight budget: Choose a passive helmet. AIMS Industrial's price guide places basic passive lift-front helmets at the very bottom of the market and lists them as suited to "very occasional use, budget, hobby, backup helmet" needs. You accept manual flipping and the need to time it carefully, and in exchange you get the lowest-cost entry point plus cheap, easily replaced lenses.
- Repetitive, single-process production welding: Choose a fixed-shade auto-darkening helmet. Miller Electric advises that if most of your welding involves similar material using the same welding process, a fixed-shade auto-darkening helmet may be the right choice. You get hands-free operation and instant darkening without paying for a shade range you will never use. One caveat: "most fixed-shade products have fixed sensitivity," Watkins noted in Canadian Metalworking—the sensors cannot be adjusted for user sensitivity.
- Professionals and multi-process welders: Choose a variable-shade auto-darkening helmet. Canadian Metalworking's primer recommends this style for welders who work with a number of different welding processes and materials, since the shade adjusts to the process, material, and application. Most variable-shade models also let you tune light sensitivity—useful for working outdoors in changing weather—so that two welders running the exact same parameters can each set sensitivity for their own visibility needs.
Budget interacts with these scenarios rather than overriding them. A hobbyist who welds several different processes may still find a variable-shade helmet worth the extra cost, because a passive helmet's fixed shade is not ideal for varied work. Conversely, a professional doing one repetitive process all day gains little from paying for adjustability. And note where the entry auto-darkening tier sits in AIMS Industrial's price guide: just above the passive range, with variable shade in the DIN 9–13 range and typically two sensors. That placement is why fixed-shade auto-darkening is often described as the middle ground—it delivers the core automatic-darkening benefit before premium adjustability pricing begins.
This article deliberately stops short of recommending models or brands, and it does not cover powered air-purifying respirator (PAPR) systems, which sit at the top of AIMS Industrial's range as full PAPR-integrated professional units. Both are separate decisions with their own criteria.
Key Considerations for Optical Clarity and Safety
Optical clarity is where the passive option surprises people. Phillips Safety's comparison states that passive welding lenses are generally more optically clear than auto-darkening lenses, giving better vision while torching, and that tinted glass maintaining a constant shade enhances vision during welding tasks. Because the glass lenses are cheap, they are easily replaced and discarded rather than repaired. If your work rewards an undistorted view of the puddle and you can tolerate flipping, the cheapest option is not a compromise on vision.
Auto-darkening helmets counter with reaction behavior and consistency of a different kind. Phillips Safety describes the automatic lens as offering instant adjustment to darkness levels upon torch activation, reverting to clarity when the torch is not in use, and eliminating the need to lift the helmet for visibility—an "unparalleled convenience" in its phrasing, though the practical value is more modest than that: the lens is always in a ready state. That ready state matters for safety, because the moments of flipping a passive helmet up and down are precisely when timing errors expose eyes to the arc.
Sensitivity adjustment is the last safety-relevant dividing line, and it runs between fixed and variable auto-darkening rather than between auto-darkening and passive. Adjustable sensitivity, which most variable-shade helmets offer, lets the welder match the helmet's triggering to the environment—Canadian Metalworking cites working outdoors in different weather conditions as the example—and to personal visibility needs. Fixed-shade products generally lack this, per Watkins: "The sensors are not able to be adjusted for user sensitivity." For welders whose conditions vary week to week, that adjustment is a comfort and usability feature, not a luxury.
Making Your Choice: A Practical Decision
Choose a welding helmet that aligns with your primary welding processes, skill level, and budget, prioritizing safety and efficiency for your specific tasks. In practice, that means matching a passive helmet to occasional, budget-limited, single-shade work; a fixed-shade auto-darkening helmet to repetitive single-process production; and a variable-shade auto-darkening helmet to multi-process professional welding. The measurable indicator that you chose correctly is straightforward to check: the chosen helmet consistently provides adequate eye protection and allows for comfortable, efficient welding without workflow interruptions. If you find yourself flipping the helmet constantly, squinting at the puddle, or wishing the shade were darker or lighter for the job at hand, that is your evidence the helmet type—not merely the model—deserves revisiting.
Sources
- Selecting the Right Welding Helmet for You — Millerwelds
- Welding Vision: Auto Darkening vs Passive Lens Choices — Phillips Safety | Leading Manufacturer of Occupational Safety Products
- Auto-Darkening Vs. Passive Welding Helmets: Which One Should You Choose? - Blog — Droppe
- Auto-Darkening vs. Passive Helmets — Welding For Less
- A primer on autodarkening weld helmets — Canadianmetalworking
- Welding Helmets — Harrisweldingsupplies
- Welding Helmet Guide: Auto-Darkening, Shades & PAPR — AIMS Industrial Supplies